 By Chris Follin
FIELD REPAIR
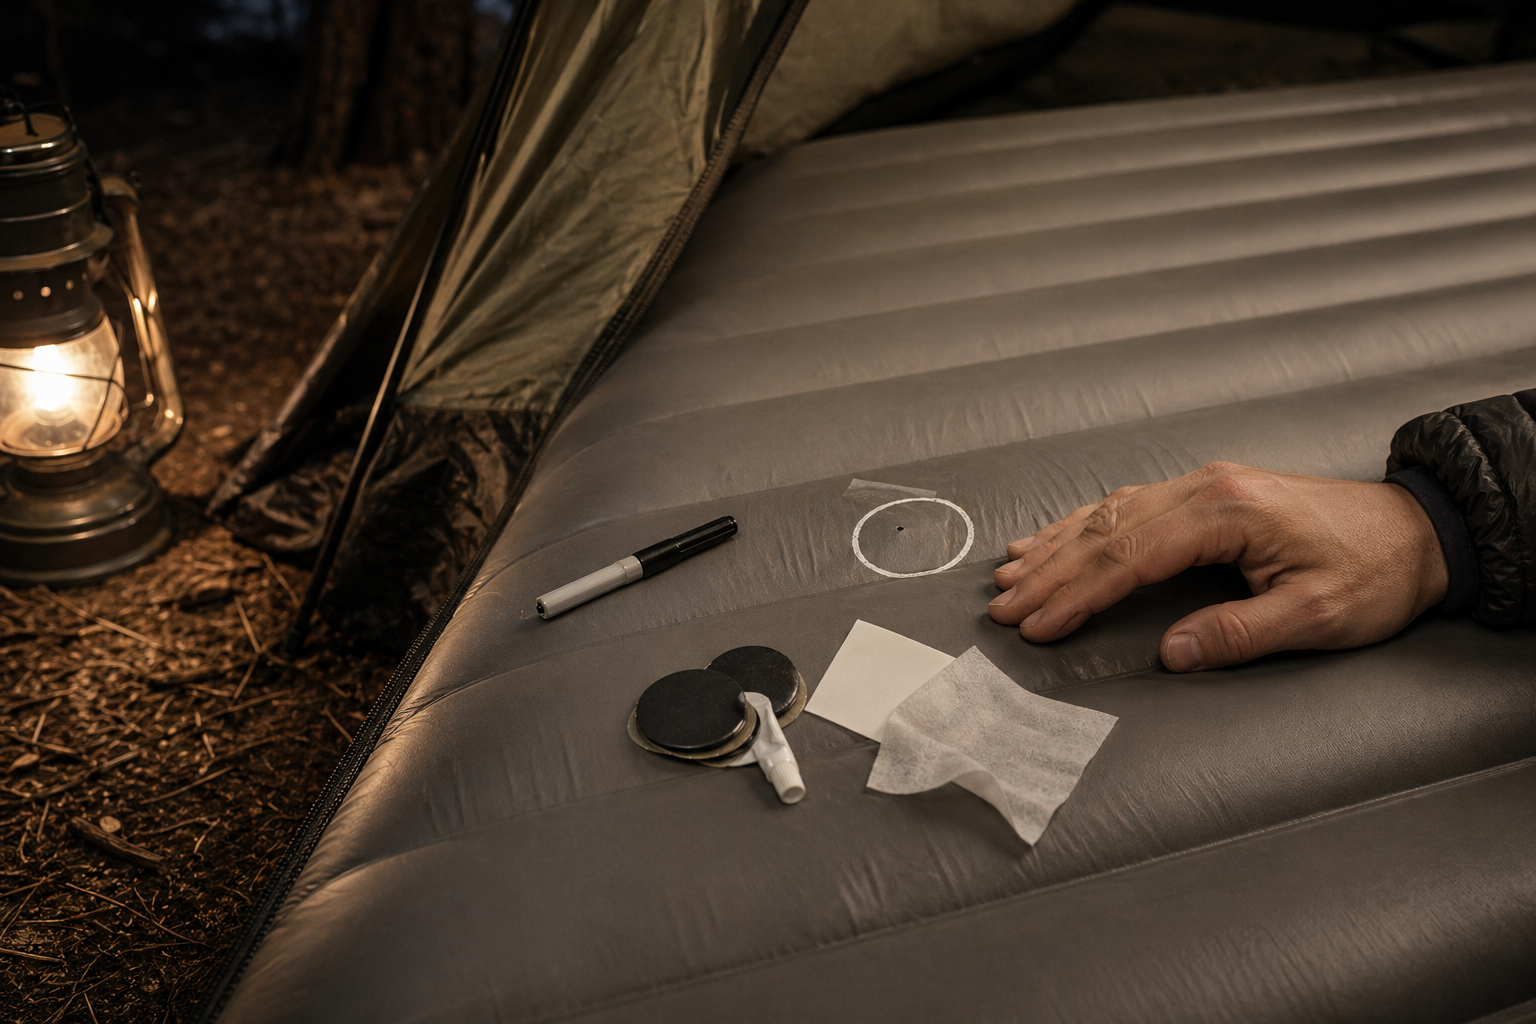
How to patch an air mattress
A patch only works if you find the real leak and prep the surface. Inflate the pad, locate the leak with sound, feel, water, or bubbles, mark it before deflating, clean and dry the area, then give the patch time to bond.
Find the leak before spending the patch
Most failed pad repairs are not because patches are magic or useless. They fail because the hole was guessed, the surface was dirty, the patch was too small, or the pad was loaded before the adhesive had a chance.
Inflate the pad firm enough that air wants to leave. Check the valve and seams first. Listen in a quiet place. Feel with damp fingers. Use soapy water if you have it and watch for bubbles. When you find the leak, mark it before deflating. That tiny dot disappears fast once the pad goes soft.
LEAK HUNT
Check the obvious places first
Do not patch random spots because the pad feels soft. Find the actual leak and mark it before the pad changes shape.
| Area | How to check | What it means |
|---|---|---|
| Valve | Listen, feel, and wet around the cap and valve body. | May need cleaning, tightening, replacement, or manufacturer parts instead of a patch. |
| Bottom fabric | Inflate firm and use soapy water or careful listening section by section. | Classic puncture. Usually the best patch candidate. |
| Seam or corner | Flex gently and look for bubbles along the seam line. | Harder repair; patch may be temporary or fail under pressure. |
| Multiple slow leaks | Repeat test after the first patch cures. | One obvious hole can hide a second tiny one. |
Prep is the repair
Most patches fail because the surface was wet, oily, fuzzy, cold, curved under pressure, or loaded before the adhesive cured. A clean dry flat surface matters more than heroic pressing.
Find the leak methodically
Start with the obvious: valve cap, valve body, seams, corners, and the area that touched the ground. If the leak is slow, inflate the pad and put weight on it while listening. Soapy water is useful because bubbles reveal tiny leaks you cannot hear.
If you are home, dunking sections in a tub can work, but dry the pad completely before patching. In the field, use as little water as needed and keep track of your mark.
Prep the patch area
Deflate the pad enough that the repair area lies flat. Clean the spot with alcohol if the material allows it and the kit recommends it. Let it dry. Dirt, skin oil, moisture, and fabric fuzz are the enemy. Round patch corners if you cut your own patch so edges are less likely to peel.
Use the patch kit made for the pad material when possible. TPU, PVC, rubberized fabric, and coated nylon do not all behave the same. Manufacturer instructions win.
Cure and test
Press the patch firmly from the center outward to push out air. Give it cure time. Some field patches can be used quickly; liquid adhesives may need hours. If you have to sleep on it soon, keep pressure lower at first and avoid loading the patch edge.
Reinflate and check for bubbles again. If bubbles appear at the edge, the surface was not sealed or the patch did not bond. If air comes from somewhere else, you found one leak but not all of them.
The patch has a chance
- Leak is marked before deflating.
- Patch is larger than the damaged area with rounded edges.
- Surface is clean, dry, and flat before bonding.
Find a different fix
- The leak is actually the valve or seam delamination.
- Patch edges lift immediately.
- Pad was run hard before adhesive cured.
Field note
A mediocre patch on a clean dry surface beats a perfect patch slapped onto campsite grime.